A crucial nursing skill is an ability to draw blood from a central line or a vein. Without the right samples, medical therapy can be ineffective or even hazardous. All nurses should become proficient in phlebotomy, the procedure of taking blood from a vein throughout their employment. Although it is not often included in nursing school curricula due to legal concerns, many advise nursing students to take additional courses to enhance this skill. So how to draw blood? Read the below article to get the comprehensive and step-by-step guide.
On this website, we offer thousands of free Phlebotomy practice test questions to help you thoroughly prepare for this exam!
The WTO’s Blood Draw Guidelines
The following is a list of the best practice recommendations for blood draws that have been provided by the World Health Organization (WHO):
- Preparation in advance
- Utilizing a suitable area
- Assurance of quality
The overarching objective of the establishment of the guidelines:
- Improving understanding and awareness of the dangers associated with phlebotomy
- Improving precautionary measures, and decrease on exposure to and transmission of blood-borne viruses.
- Increasing the calmness and assurance of the patients.
- Enhancing the quality of laboratory testing.
Hospitals are required to comply with the following standards of patient care by the WHO:
- Availability of the necessary materials as well as safety gear
- Provision of treatment for post-exposure prophylaxis (PEP)
- Avoidance of phlebotomy equipment that may be contaminated
- Appropriate training in phlebotomy
- Patient’s willingness to cooperate
- Quality of the samples taken at the laboratory
WTO also outlines potentially hazardous and inappropriate procedures for drawing blood, including the following:
- Putting new caps on old needles while using both hands
- Recapping and dismantling tubes and containers that contain vacuum
- Reusing tourniquets and vacuum tube holders
Step-by-Step Process of How to Draw Blood
How to draw blood? The fundamental processes for drawing or extracting blood are as follows:
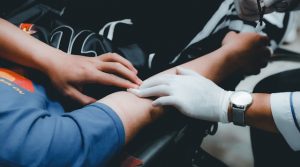
- The first stage is to explain what you will be doing to the patient and why, as well as to collect all the equipment required.
- After that, choose the vein you’ll be utilizing. The antecubital fossa is the most often-used vein.
- After applying a tourniquet, swab the area with alcohol for 30 seconds.
- At a 30-degree angle, insert the beveled needle into the vessel.
- Once blood is seen in the tube, attach the vacutainers or drawback with a syringe.
- Label the tubes properly and deliver them to the lab for examination.
Step 1: Find and Identify the Vein
The first thing that must be done to take blood from a patient effectively is to locate the veins that should be punctured. The median cubital vein in the antecubital fossa is the most popular option and the one that is utilized most often for adult patients. The antecubital, sometimes known as the AC, is the most common name for this. It is tucked away in the crook of the elbow, in the space between the median cephalic vein and the median basilic vein.
This is a very big vessel that, if punctured correctly, has the potential to provide high-quality blood samples. This channel may be used by certain healthcare facilities to receive blood-drawing peripheral intravenous catheters so that regular blood draws may be performed.
This vein is the best option for phlebotomists who are just starting since it is near the surface of the skin and does not typically roll when it is pierced. In addition, in comparison to other veins in the hands, it has a far lower chance of causing damage to the surrounding nerves, arteries, and tendons.
It is necessary to get an understanding of the anatomy of the body’s principal arteries and veins to become skilled at phlebotomy. If access to the antecub has already been gained, there are viable ways for performing the venipuncture. Other veins that are often utilized are the basilic vein and the cephalic vein.
IMPORTANT: Not only is it essential to be familiar with the best veins to access, but it is also vital to know where to avoid blood draws. These areas include the following:
- Fistulas and grafts
- Edematous sites (swollen sites filled with serous fluid)
- Areas that have been damaged or burnt
- Hematomas
- Areas in the same vascular that are above an IV cannula
- Arm with a PICC line
- a blood clot in the arm that either has existed or is now present
- The surgical incision on the side of a mastectomy
- Existing cuts, sores, or areas of infection
- Arm on the side of a surgical operation that receives transfusions of blood
- Arm in which blood is being transfused
Step 2: Gather Supplies
After locating an adequate location for the blood draw, the next step is to acquire the necessary materials. In certain establishments, the nurses are given kits that include all of the necessary supplies, while in others, they are required to obtain the goods on their own. A vital piece of advice: bring more supplies into the patient’s room if you need to try to venipuncture the patient again. These items are included in the supplies:
- Appropriate blood-drawing needles
- Tubes specific to labs ordered
- Personal Protective Equipment
- Bandage or tape that is adhesive
- Hand Sanitizer
- Alcohol swabs for disinfecting the skin
- Personal Protective Equipment
- Bags for transporting biohazardous materials
- Gauze
- Devices for the transfer of blood
- Forms used in the laboratory
- Sharps container that is resistant to puncturing
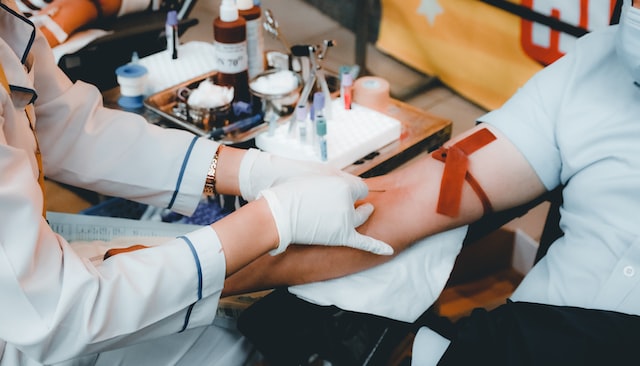
Step 3: Venipuncture
Obtain a precise venipuncture by doing the following procedures after gathering the necessary equipment. Once again, we ask that you remember that these are only recommendations for blood draws and that clinicians should always seek advice from the relevant medical staff before administering this treatment to patients.
Furthermore, newborns are not included in this group; only adults and pediatrics are.
- Starting by explaining the process and the logic behind the blood test.
- As required by JCAHO, identify the patient using two patient IDs.
- Verify the results of the ordered tests, then complete the necessary forms and labels.
- Ask the patient if they have any allergies or sensitivities to latex, adhesives, or antiseptics.
- Place the patient.
- Maintain hand hygiene and utilize the proper PPE.
- 3–4 inches should be applied as a tourniquet above the chosen area. Keep a close eye on the arm to make sure that it is not being stretched too far or for more than 2 minutes.
- Request the patient to make a fist rather than pump their hand. Contrary to popular belief, pumping the hand does not improve venous circulation.
- Cleanse the venipuncture site for 30 seconds with an alcohol prep pad, then let the area air dry for 30 seconds. Don’t wave, fan, or blow on the area since doing so contaminates it and raises the risk of infection.
- To pull the skin tight and prevent the vein from rolling, firmly grasp the patient’s lower arm (below the point of puncture). Angle the needle into the vessel between 15 and 30 degrees.
- Blood should flash into the catheter if it has been put correctly. If this doesn’t occur, the needle has either not punctured the vein or come via the vessel.
- To extract the appropriate amount of blood, attach the required tubes or syringes. As soon as the last drop of blood is extracted, remove the tourniquet.
- Remove the needle from the patient’s arm, then use gauze to apply pressure on the vessel.
- Put hazardous items and needles in the containers that have been authorized by the hospital.
- At the bedside, label the proper tubes and pack them in transport bags.
- Quickly deliver blood samples to the lab. Hemolysis might happen from late blood delivery, which can affect the test findings.
If you can’t reach the vein at first, don’t give up. Always remember to seek out advice from more experienced nurses and take advantage of chances to put your skill to use.
Read more >>Phleb Medical Term You Should Know to Become Phlebotomists
Tips and Warnings When Drawing Blood
Tips
- When it comes time to take their blood, some individuals become quite anxious. You should strongly encourage the patient not to observe when the needle is being inserted. Take safeguards in case your patient gets dizzy or fainting. Patients should only be allowed to leave the hospital if they have made a complete recovery.
- When taking blood from a young kid, you may want to propose to the parent that the child sits on their lap so that they feel more at ease.
- Allow the patient to concentrate their attention on anything other than the needle.
Warnings
- Don’t ever make more than two attempts to draw blood. If you are unable to finish the blood draw, ask a nurse.
- If any of your materials get stained with blood or if you or your patient are penetrated with a contaminated needle, you should follow the appropriate preventive precautions.
- Ask a doctor/nurse if you can’t stop the bleeding.
- It is best to remove a tourniquet from a patient’s arm after no more than one minute has passed.
How to draw blood? The answer is mentioned above. Although taking blood from a patient might be difficult, it is a necessary skill for nurses. Practice as much as possible so that you can be professional in the blood draw. Good luck

PCCN vs CCRN: Which Certification Should I Take?
In this discussion, we will examine the fundamental distinctions between PCCN vs CCRN certifications, allowing you to make an informed and right decision about which certification is best for your nursing career progression.
June 20, 2023
Is PCCN Worth It? A Comprehensive 2025 Study Guide
In this article, we will provide all the enrollment criteria, how to apply, whether is PCCN worth it for you to obtain, and how to get a high mark.
June 20, 2023

PCCN Requirements - How to Become a Progressive Care Certified Nurse?
To become a progressive care nurse, you must first obtain the PCCN certification. This post will help you understand PCCN certification, PCCN requirements, and efficient approaches to obtaining this certification.
June 20, 2023