
CompTIA A+ certification is regarded as one of the best entry-level credentials in the IT industry. It covers a wide range of subjects without delving too deeply into any of them. As a result, it is excellent for IT professionals searching for a firm foundation to assist establish their careers.
Because it is an entry-level certification, it may be the first time some cert-seekers are required to learn fundamental Linux commands. Fortunately, the CompTIA A+ Linux commands specified in the A+ goals aren’t too challenging. With a little research and practice, you’ll be comfortable with these commands in no time.
Let’s get started with our free CompTIA A+ practice test to strenghthen your knowledge and pass the exam with a high score.
List of Basic CompTIA A+ Linux Commands
CompTIA A+ Core 2 (200-1002) test Objective 1.9 lists 20 distinct Linux/Mac OS commands. These are the *nix commands:
- ls
- grep
- cd
- shutdown
- pwd
- passwd
- mv
- cp
- rm
- chmod
- chown
- iwconfig
- ifconfig
- ps
- su
- sudo
- apt-get
- vi
- dd
- kill
This provides us with a precise set of commands on which to concentrate our efforts. Before we get into examples, let’s go over some fundamentals about switches and man pages.
Understanding Linux Commands: Options/Switches
Certain of our command examples feature a dash “-” followed by some characters, such as ls -l. The dash with extra characters are typically known as “switches” or “options.” These toggles are optional (i.e. you can use the command without them). In general, a switch modifies the behavior of a command in some way.
Simply adding the -l option to ls, for example, informs us a lot more about file permissions. Often, you may combine switches to apply numerous settings at the same time.
Understanding the notion of switches is critical to comprehending Linux commands.
Getting to Know Linux: man/info & help
Even basic Linux commands have a plethora of arguments and methods to be used. We’ll stick to the basics here and avoid diving too far into the weeds. It’s crucial to note, however, that you can acquire full information about command usage directly from a Linux terminal. In most cases, this will include entering man (e.g., man ls), info, or command –help. You may also find man pages online, such as this very extensive collection on man7.org.
Don’t stress about understanding all of the many usage scenarios just yet. Just know that if you ever get stuck dealing with a command, there is a place to look.
Linux Commands: Prompts, Home Directories, Examples
When you glance at a Linux terminal, you’ll see a prompt that normally concludes with a dollar symbol $ (for standard users) or a pound sign # (for power users) (for the superuser or root user). That prompt is frequently in the form username@computername:current working directory> (which refers to the user’s home directory). You’ll get used to it quickly, but it’s crucial to know for novices that the commands are everything following the prompt.
On an Ubuntu installation, for example, we’re using a user called “cooluser” in this post. As a result, you’ll see the following before most of our commands:
|
:~$ |
If you’re practicing with the examples below, there’s no need to write anything before the $.
Your prompt will be somewhat different, generally with a username hidden behind it. The prompts in other online instances may also differ. Some prompts may be different. Some people may disregard the prompt entirely. Others may simply use the $ or # to indicate whether commands are performed as a normal or superuser/root user.
Avoiding Typos: Tab completion is your ally
When working on a command line, it’s simple to make mistakes. Tab completion can assist decrease typing mistakes on most recent Linux computers. The tab completion mechanism is straightforward: using the TAB key will finish as much of the command as feasible based on what you have written. This is very handy when dealing with several pathways on a system.
If we were to move directory (using cd) from /home/cooluser/ to /home/cooluser/subdirectoryone and there was no other file or directory beginning with a “s” in /home/cooluser/, merely entering cd s and pressing the TAB key will autocomplete to cd subdirectoryone.
Explanations and examples of 20 Linux Commands
With the requirements and advice out of the way, let’s get started to learn more the list that you must know linux commands for developers for the A+ test. To get you started, we’ll give an explanation and examples for each command.
To be consistent with the A+ test objectives, we’ve consolidated a couple of the items, especially “pwd versus password,” “iwconfig/ifconfig,” and “su/sudo.”
Command 1: ls
ls is a commonly used Linux command. It is used to display a list of files and directories included within a directory. When used with other options, ls may provide a wealth of information about files and permissions.
ls prints (displays) all documents and directories in your working directory:
|
:~$ ls accouting.csv coolpictures.png interestingscript.sh learningnotes.txt logessay.docx :~$ |
ls /path/to/another/directory/ displays a listing of all the files and directories in /path/to/another/directory/. (fill in the path to make sense for your system). You may use the same /path/to/another/directory/ strategy to additional switches and commands. In this example, we will list the files in /tmp/tempfiles/ as follows:
|
:~$ ls /tmp/tempfiles/ draftscript.sh interestingstory.tmp knowledge.nugggets :~$ |
ls -l displays a list of files and directories, as well as their permissions, the user who owns the file/directory, the group that owns the file/directory, the last modified date/time, and the total number of file system blocks used.
|
:~$ ls -l total 0 -rw-rw-rw- 1 cooluser cooluser 0 Jun 24 21:50 accouting.csv -rw-rw-rw- 1 cooluser cooluser 0 Jun 24 21:50 coolpictures.png -rw-rw-rw- 1 cooluser cooluser 0 Jun 24 21:50 interestingscript.sh -rw-rw-rw- 1 cooluser cooluser 168 Jul 3 13:31 learningnotes.txt -rw-rw-rw- 1 cooluser cooluser 0 Jun 24 21:50 logessay.docx :~$ |
In the ls output, ls -a includes hidden files, those that begin with a “.”
|
:~$ ls -a .bash_logout .config .motd_shown .sudo_as_admin_successful coolpictures.png logessay.docx .bashrc .landscape .profile .viminfo interestingscript.sh .bash_history .cache .local .ssh accouting.csv learningnotes.txt :~$ |
Command 2: grep
grep searches for specific patterns in text files or other input, such as command output. Specifically, grep searches for and displays lines that match a specific regular expression, often known as a regex.
For example, we can use grep “sysadmin” learningnotes.txt to discover the term “sysadmin” in the plaintext file “learningnotes.txt.”
|
:~$ grep “sysadmin” learningnotes.txt sysadmin sysadmin’s work hard sysadmins study a lot sysadmins are admins of systems :~$ |
We can use grep “sysadmin’s” learningnotes.txt to filter that down to instances we typed sysadmins with an apostrophe.
|
:~$ grep “sysadmin’s” learningnotes.txt sysadmin’s work hard :~$ |
We may use the -i switch to perform a case-insensitive search, as seen below: grep -i “sysadmin” learningnotes.txt (notice in this check, we also found “SysADmIn”).
|
:~$ grep -i “sysadmin” learningnotes.txt sysadmin sysadmin’s work hard sysadmins study a lot sysadmins are admins of systems SysADmINn :~$ |
It’s also usual to use grep to parse a command’s output (stdout). To do so, just type the command, followed by a pipe “|” and the grep command we wish to use. ls | grep “.txt” will, for example, output only files in the current working directory with the suffix “.txt.”
|
:~$ ls | grep “.txt” learningnotes.txt :~$ |
In fact, a command like find is typically preferable than grep and ls together.
Command 3: cd
The command cd is used to “change folders.” If you need to travel to other directories, cd is the tool to use. When working with cd, it is critical to distinguish between absolute and relative routes. Absolute pathways begin with the letter /. Relative pathways do not begin with a leading / character. The leading / represents your system’s root directory. When using relative paths, cd begins in your current working directory.
Let’s look at an example to get a sense of cd and paths. Our home directory in this case is /home/cooluser. There is just one subfolder in that directory, /home/cooluser/subdirectoryone. There is one more subfolder in /home/cooluser/subdirectoryone, /home/cooluser/subdirectoryone/subdirectorytwo.
Let’s begin in /home/cooluser. From this, we can cd subdirectoryone to enter subdirectoryone (pwd, as we’ll find in a later section, prints the current working directory).
|
:~$ pwd /home/cooluser :~$ cd subdirectoryone/ :~/subdirectoryone$ pwd /home/cooluser/subdirectoryone :~/subdirectoryone$ |
To proceed to the next subdirectory, we might use cd subdirectorytwo.
|
:~/subdirectoryone$ cd subdirectorytwo/ :~/subdirectoryone/subdirectorytwo$ pwd /home/cooluser/subdirectoryone/subdirectorytwo :~/subdirectoryone/subdirectorytwo$ |
Let’s try cd subdirectoryone to get back to subdirectoryone now that we’re in /home/cooluser/subdirectoryone/subdirectorytwo.
|
:~/subdirectoryone/subdirectorytwo$ cd subdirectoryone -bash: cd: subdirectoryone: No such file or directory :~/subdirectoryone/subdirectorytwo$ |
Surprisingly, we get the message “cd: subdirectoryone: No such file or directory.” However, we are aware of the existence of subdirectoryone. We also know that only a few minutes before, cd subdirectoryone took us to /home/cooluser/subdirectoryone. So, what’s the distinction now?
Subdirectoryone was within our current working directory on our initial try. That is, it was accessible through cd from where we were (/home/cooluser). Because there is no subdirectoryone relative to our current working directory after we are at /home/cooluser/subdirectoryone/subdirectorytwo, the cd command fails.
This problem may be solved by using cd with the absolute path /home/cooluser/subdirectoryone, such as this cd /home/cooluser/subdirectoryone.
|
:~/subdirectoryone/subdirectorytwo$ cd /home/cooluser/subdirectoryone :~/subdirectoryone$ pwd /home/cooluser/subdirectoryone :~/subdirectoryone$ |
Instead, we may use cd.. to move “up” one directory, as seen below:
|
:~/subdirectoryone/subdirectorytwo$ pwd /home/cooluser/subdirectoryone/subdirectorytwo :~/subdirectoryone/subdirectorytwo$ cd .. :~/subdirectoryone$ pwd /home/cooluser/subdirectoryone :~/subdirectoryone$ |
Use cd / to get to a system’s “root” directory.
|
:~$ pwd /home/cooluser :~$ cd / :/$ pwd / :/$ |
Command 4: shutdown
Depending on the switches you choose, shutdown turns off, halts, or reboots the machine. shutdown [options] [time] [wall] is the standard syntax. When the shutdown starts, the message “Wall” will be presented to users.
The shutdown command is used to turn off the system (usually with a default one-minute delay).
|
:~$ shutdown |
shutdown -H causes a halt rather than a power down.
|
:~$ shutdown -H |
shutdown -r initiates a reboot.
|
:~$ shutdown -r |
shutdown now or shutdown +0 promptly shuts down the system. Without the one-minute pause
|
:~$ shutdown now :~$ shutdown +0 |
shutdown -r +5 initiates a five-minute reboot of the system.
|
:~$ shutdown -r +5 |
A pending shutdown command is cancelled using shutdown -c.
|
:~$ shutdown -c |
Command 5 & 6: pwd vs. passwd
Password is sometimes shortened as pwd. As a result, you may expect the pwd and passwd commands to perform something similar, but they don’t. The current working directory is displayed by pwd. The passwd command is used to change passwords.
For example, if we return to our earlier directory examples, pwd will print /home/cooluser on the screen.
|
:~$ pwd /home/cooluser :~$ |
The passwd command, on the other side, will provide a prompt for us to update our password.
|
:~$ passwd Changing password for cooluser. Current password: New password: Retype new password: passwd: password updated successfully :~$ |
To change the password of another account named “seconduser,” we need sudo capabilities, which we have (more on sudo below), and then we simply run sudo passwd seconduser and follow the prompts.
|
:~$ sudo passwd seconduser [sudo] password for cooluser: New password: Retype new password: passwd: password updated successfully :~$ |
Command 7: mv
The mv command is used to relocate files from one location to another (rather than copying them). mv is also excellent for renaming files because of how it operates. mv includes a number of backup options, as well as the ability to overwrite or not overwrite files, but the fundamental usage is as easy as.
|
:~$ mv |
In the following example, we have a file called “coolpictures.png” in our current working directory that we wish to change to “awesomepics.png.” That is possible using the command mv coolpictures.png awesomepictures.png.
|
:~$ ls accouting.csv coolpictures.png interestingscript.sh learningnotes.txt logessay.docx subdirectoryone :~$ mv coolpictures.png awesomepics.png :~$ ls accouting.csv awesomepics.png interestingscript.sh learningnotes.txt logessay.docx subdirectoryone :~$ |
mv works with both absolute and relative routes. We can use the command mv accounting.csv /tmpdir to relocate our “accounting.csv” file to the /tempdir directory.
|
:~$ ls accounting.csv awesomepics.png interestingscript.sh learningnotes.txt logessay.docx subdirectoryone :~$ mv accounting.csv /tmpdir :~$ ls /tmpdir/ accounting.csv :~$ ls awesomepics.png interestingscript.sh learningnotes.txt logessay.docx subdirectoryone :~$ |
Likewise, when in /home/cooluser, we can use mv longessay.docx subdirectoryone/greatessay.docx to transfer our “longessay.docx” file to /home/cooluser/subdirectoryone and replace it “greatessay.docx.”
|
:~$ ls awesomepics.png interestingscript.sh learningnotes.txt longessay.docx subdirectoryone :~$ mv logessay.docx subdirectoryone/greatessay.docx mv: cannot stat ‘logessay.docx’: No such file or directory :~$ ls awesomepics.png interestingscript.sh learningnotes.txt longessay.docx subdirectoryone :~$ mv longessay.docx subdirectoryone/greatessay.docx :~$ ls subdirectoryone/ greatessay.docx subdirectorytwo :~$ ls awesomepics.png interestingscript.sh learningnotes.txt subdirectoryone :~$ |
To relocate all the files in a directory, use an asterisk * as shorthand for “everything here.” For example, to relocate the contents of our current working directory to /tmpdir, execute the command mv * /tmpdir.
|
:~$ ls /tmpdir/ accounting.csv :~$ ls awesomepics.png interestingscript.sh learningnotes.txt subdirectoryone :~$ mv * /tmpdir/ :~$ ls /tmpdir/ accounting.csv awesomepics.png interestingscript.sh learningnotes.txt subdirectoryone :~$ ls :~$ |
Command 8: cp
It’s simple to grasp cp if you’ve mastered mv. They function similarly, except that cp copies rather than transfers files. Returning to our initial mv coolpictures.png awesomepics.png, we can use cp coolpictures.png awesomepics.png to create a duplicate of “coolpictures.png” titled “awesomepics.png” without deleting the original.
|
:~$ ls coolpictures.png interestingscript.sh learningnotes.txt longessay.docx subdirectoryone :~$ cp coolpictures.png awesomepics.png :~$ ls awesomepics.png coolpictures.png interestingscript.sh learningnotes.txt longessay.docx subdirectoryone :~$ |
Command 9: rm
The rm command is used to delete or “remove” files. When dealing with rm, keep in mind that you won’t always have the luxury of something like a recycling bin on Linux servers.
We may use the command rm junkfile.txt to delete the file “junkfile.txt” from our current working directory.
|
:~$ ls awesomepics.png coolpictures.png interestingscript.sh junkfile.txt learningnotes.txt longessay.docx subdirectoryone :~$ rm junkfile.txt :~$ ls awesomepics.png coolpictures.png interestingscript.sh learningnotes.txt longessay.docx subdirectoryone :~$ |
We may use absolute and/or relative paths to remove the file if it was in a different directory. rm, like several other commands, can be used with the wildcard character asterisk.
If you need to remove a directory containing files, rm without any options will not suffice. You may, however, use rm -r (with caution!). For example, we may execute rm -r subdirectorytwo from /home/cooluser/subdirectoryone to delete /home/cooluser/subdirectoryone/subdirectorytwo and its contents.
|
:~/subdirectoryone/subdirectorytwo$ cd .. :~/subdirectoryone$ ls subdirectorytwo :~/subdirectoryone$ rm -r subdirectorytwo/ :~/subdirectoryone$ ls :~/subdirectoryone$ |
Command 10: chmod
Because Linux file permissions may get complicated, we prepared a post that concentrates on chmod and chown[a]. For the time being, let’s concentrate on the fundamentals of these two instructions. In this section, we’ll examine into chmod, which is used to change a file’s read, write, and execute permissions. Assume we wanted to add “execute” rights to our “interestingscript.sh” file for all users.
To do this, we may use the command sudo chmod +x interestingscript.sh. As seen in the example below, the “x” (execute) permission was added for the person who owns the file (the “x” that is the fourth character in the ls -l interestingscript.sh output), the group who owns the file (the seventh character), and everyone else (tenth character).
|
:~$ ls -l interestingscript.sh -rw-rw-rw- 1 cooluser cooluser 0 Jul 3 15:10 interestingscript.sh :~$ sudo chmod +x interestingscript.sh [sudo] password for cooluser: :~$ ls -l interestingscript.sh -rwxrwxrwx 1 cooluser cooluser 0 Jul 3 15:10 interestingscript.sh :~$ |
Command 11: chown
chown is used to specify who owns a file. Continuing with our “interestingscript.sh” example, imagine we wanted to change the file’s owner to “seconduser” and the group to seconduser’s group. We may accomplish this by using the command sudo chown seconduser: interestingscript.sh.
|
:~$ ls -l interestingscript.sh -rwxrwxrwx 1 cooluser cooluser 0 Jul 3 15:10 interestingscript.sh :~$ sudo chown seconduser: interestingscript.sh :~$ ls -l interestingscript.sh -rwxrwxrwx 1 seconduser seconduser 0 Jul 3 15:10 interestingscript.sh :~$ |
We might have eliminated the colon: if we just intended to modify the person who owns the file and not the group. Use the command sudo chown seconduser interestingscript.sh, for example.
Command 12 & 13: iwconfig vs ifconfig
Before we get started, it’s worth mentioning that the ip command is becoming increasingly used on current Linux systems. In production contexts, you should become used to using ip rather than ifconfig. In reality, you may need to manually install iwconfig and ifconfig on many recent Linux variants.
That being stated, for the time being, let’s concentrate on the two commands mentioned in the A+ test objectives: iwconfig and ifconfig. Both of these commands are used to setup and retrieve network interface information. The main distinction is that iwconfig is a wireless interface-specific program, whereas ifconfig is an universal utility. There’s a lot you can do with iwconfig and ifconfig, but we’ll stick to the essentials for now.
Enter the ifconfig command without any switches to display network interface information such as IP address, broadcast address, and subnet mask for all active interfaces.
|
:~$ ifconfig |
Similarly, to view wireless-specific information such as signal quality, controlled frequency, and access point MAC addresses, use the iwconfig command.
|
:~$ iwconfig |
Use ifconfig -a to see information on all interfaces (active or dormant).
|
:~$ ifconfig -a |
Command 14: ps
The ps command is used to obtain information about the process status for running processes. Because there are two methods to choices, this command can be a little perplexing. A dash is not used in the BSD (Berkeley Software Distribution) style settings. Linux/Unix/GNU style choices, on the other hand, do utilize dashes. To keep things constant, we’ll stick with the *nix approach.
ps displays all of the processes that are currently operating in the current shell. Each process’s PID (Process ID), connected terminal (TTY), amount of CPU time spent (TIME), and individual command (CMD) are displayed here.
|
:~$ ps PID TTY TIME CMD 4 tty1 00:00:00 bash 72 tty1 00:00:00 ps |
ps -e and ps –A produce identical results to ps, except they include all active processes.
|
:~$ ps -e PID TTY TIME CMD 1 ? 00:00:00 init 3 tty1 00:00:00 init 4 tty1 00:00:00 bash 73 tty1 00:00:00 ps :~$ ps -A PID TTY TIME CMD 1 ? 00:00:00 init 3 tty1 00:00:00 init 4 tty1 00:00:00 bash 74 tty1 00:00:00 ps :~$ |
By using the -F option, you may get more information about the processes that are currently executing. With ps -F, we can now see the process owner’s user ID (UID), the process ID (PID), the parent process’s PID (PPID), CPU usage (C), set size of memory allocated (SZ), resident set size (RSS), which is the actual memory in use in kilobytes, processor associated with the process (PSR), time the process started (STIME), and the specific name of the command (CMD).
|
:~$ ps -F UID PID PPID C SZ RSS PSR STIME TTY TIME CMD cooluser 4 3 0 4521 3616 0 11:51 tty1 00:00:00 -bash cooluser 76 4 0 4662 1888 0 12:13 tty1 00:00:00 ps -F :~$ |
You may combine parameters to further change the output of ps, just like you can with the other commands on the list.
Command 15 & 16: su/sudo
To switch to a different user, use the su command. The sudo command is used to perform a command as a certain user, usually the superuser or root. To use sudo, a user must be granted appropriate rights, which are often stored in a file called /etc/sudoers. Let’s look at some su and sudo samples.
Take care while running commands as the “root” or “superuser” user. If there is no compelling need to do so, try to avoid running commands with elevated privileges.
We’ll use sudo and enter our password when requested to run a command as root. In this case, we’ll use the whoami command to output the current user’s username on the screen. Remember that the command we’re using is random, and sudo may be used with almost any other command.
|
:~$ sudo whoami [sudo] password for cooluser: root :~$ whoami cooluser :~$ |
To execute a command as “seconduser,” type sudo -u seconduser and provide our password when asked.
|
:~$ sudo -u seconduser whoami [sudo] password for cooluser: seconduser :~$ |
su comes in handy if we want to change the account we’re currently using. To switch to our “seconduser” account, for example, we may use the command su seconduser and provide the password for the “seconduser” account. We just write exit to quit our shell as “seconduser.”
|
:~$ su seconduser Password: $ whoami seconduser $ exit :~$ whoami cooluser :~$ |
Command 17: apt-get
apt-get is a tool used for package management on systems that use.deb packages, such as Debian and Ubuntu. apt-get may assist you with tasks such as installing, removing, and updating packages.
It’s vital to know that apt-get searches particular repositories for packages. That implies that in certain cases, you may need to change the default repositories your system uses or add new arguments to your tasks. “/etc/apt/sources.list” is frequently used to locate a list of repositories for your system.
To keep everything simple, we’ll stick to the fundamental apt-get instructions. To get apt-get to function in many circumstances, you’ll need to run it as the superuser, therefore we’ll start our examples using sudo.
The command sudo apt-get install can be used to install a package from a default repository. On Ubuntu, for example, we may execute sudo apt-get install firefox to install the Firefox web browser.
|
:~$ sudo apt-get install firefox |
… and then confirm when requested.
|
0 upgraded, 55 newly installed, 0 to remove and 0 not upgraded. Need to get 64.8 MB of archives. After this operation, 264 MB of additional disk space will be used. Do you want to continue? [Y/n] y |
Conversely, we may use sudo apt-get remove to delete (uninstall) a package. As a result, we may run sudo apt-get remove firefox to uninstall Firefox.
|
:~$ sudo apt-get remove firefox |
… and confirm when requested.
|
The following packages will be REMOVED: firefox 0 upgraded, 0 newly installed, 1 to remove and 0 not upgraded. After this operation, 203 MB disk space will be freed. Do you want to continue? [Y/n] y |
These three commands are useful for upgrades, updates, and clearing out old packages:
|
sudo apt-get update fetches available updates sudo apt-get upgrade installs select updates sudo apt-get autoremove removes old packages deemed no longer required |
Command 18: vi
vi is a long-standing text-editing application. Many people may tell you that they prefer alternative text editors, such as nano or vim, yet vi is still widely used today. Here’s a basic primer on vi.
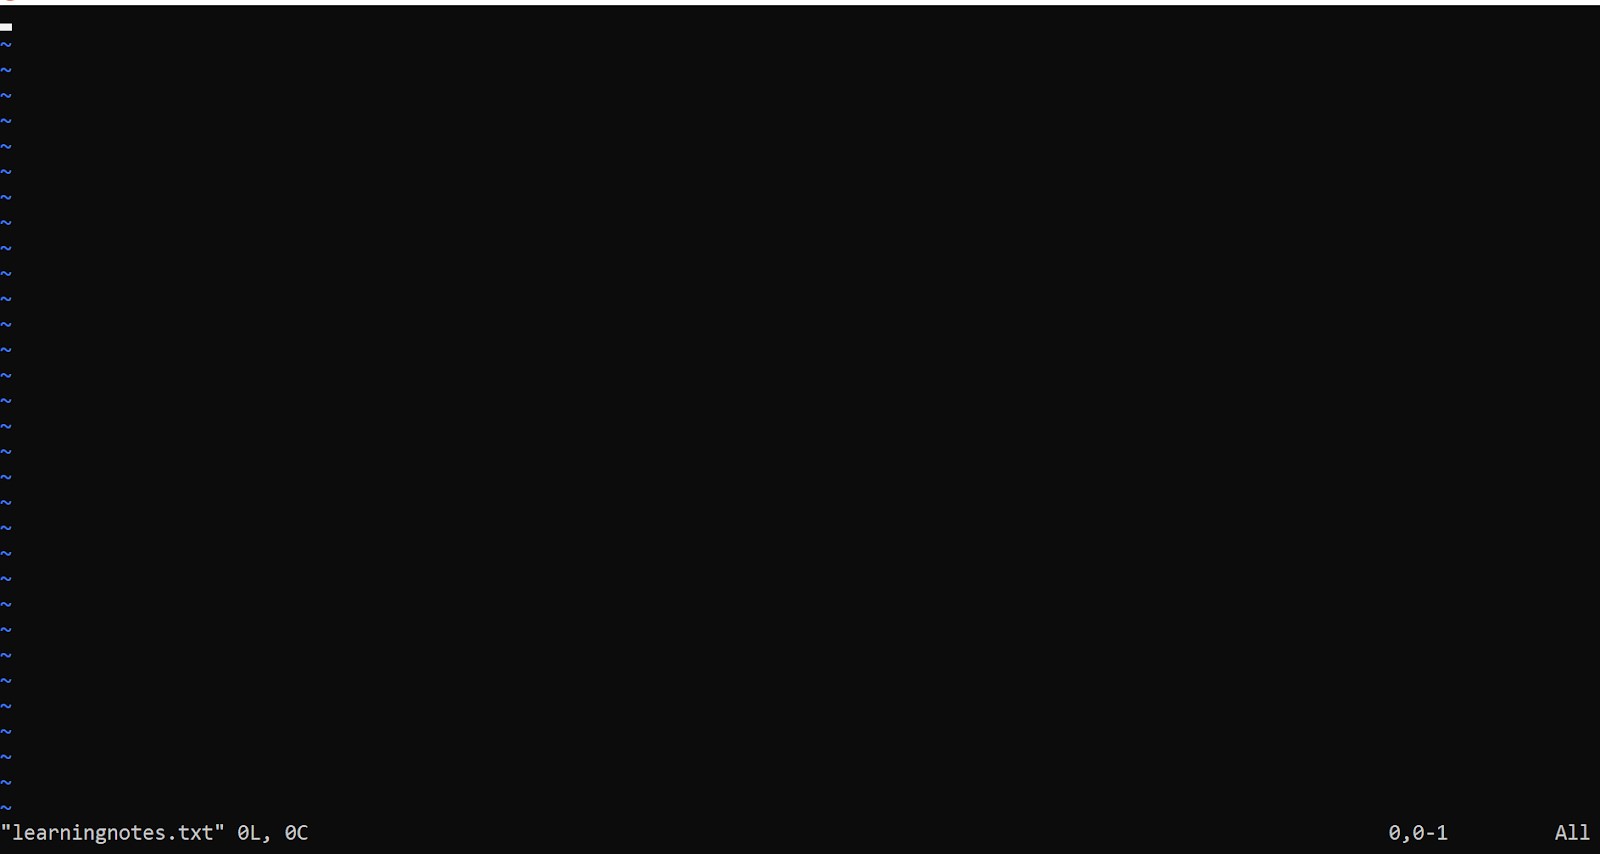
To edit a file in your current working directory, type vi. To edit our “learningnotes.txt” file, for example, type vi learningnotes.txt
|
:~$ vi learningnotes.txt |
This will launch the vi text editor and open the presently blank file.
Before we begin entering text, we’ll enter vi’s insert mode by pressing the “INSERT” key on our keyboard.

And now we’re in insert mode, we can input some text with our keyboard.
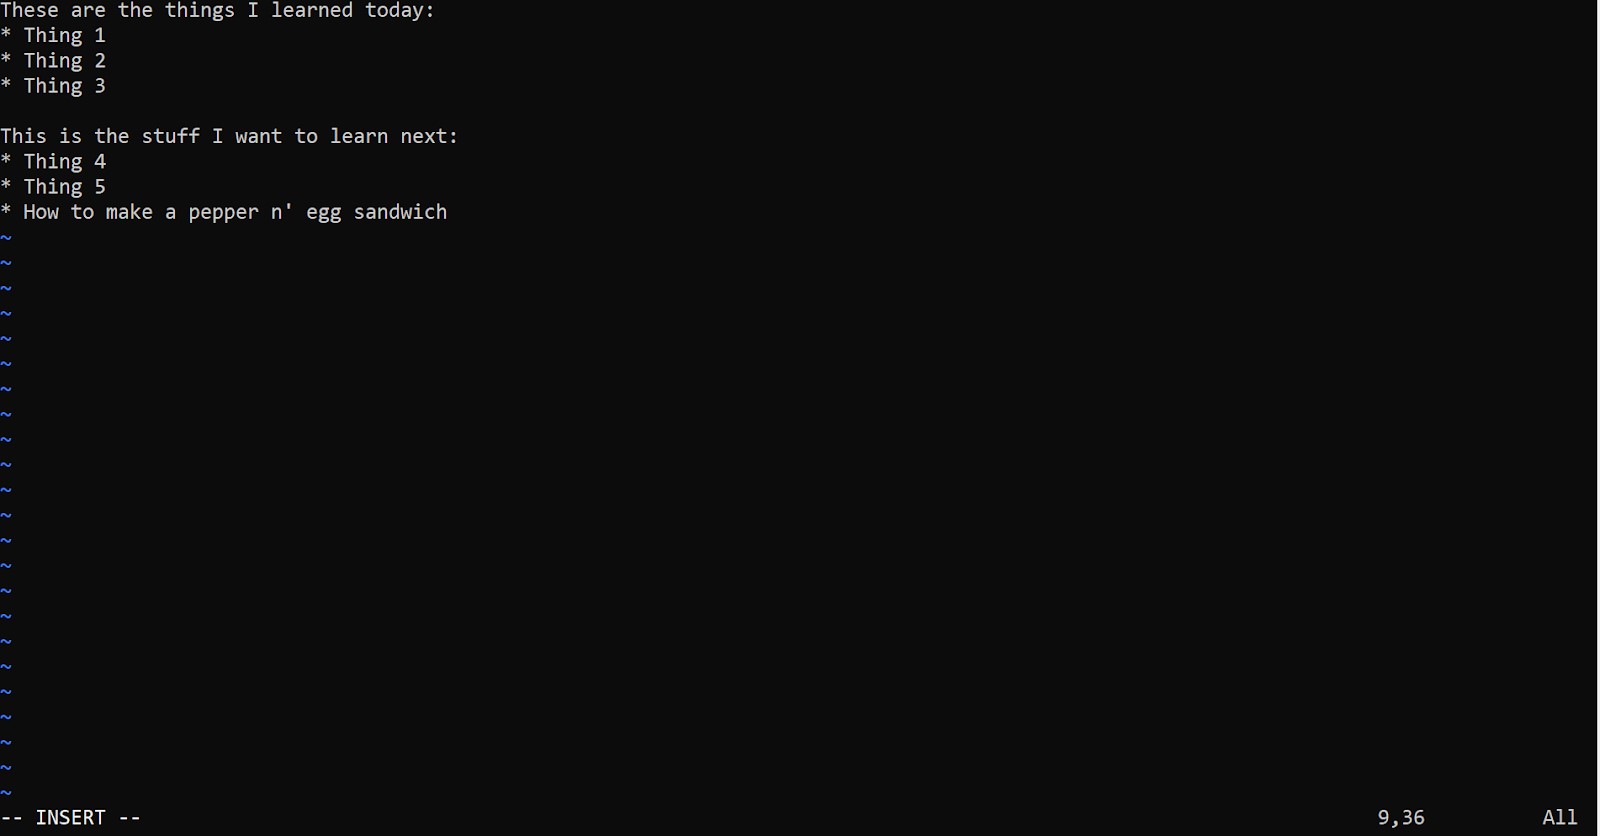
When we’re ready to quit and save the file, we’ll use the “ESC” key to exit insert mode first. Then, to save and leave, we type :wq and click “ENTER” (or write & quit).
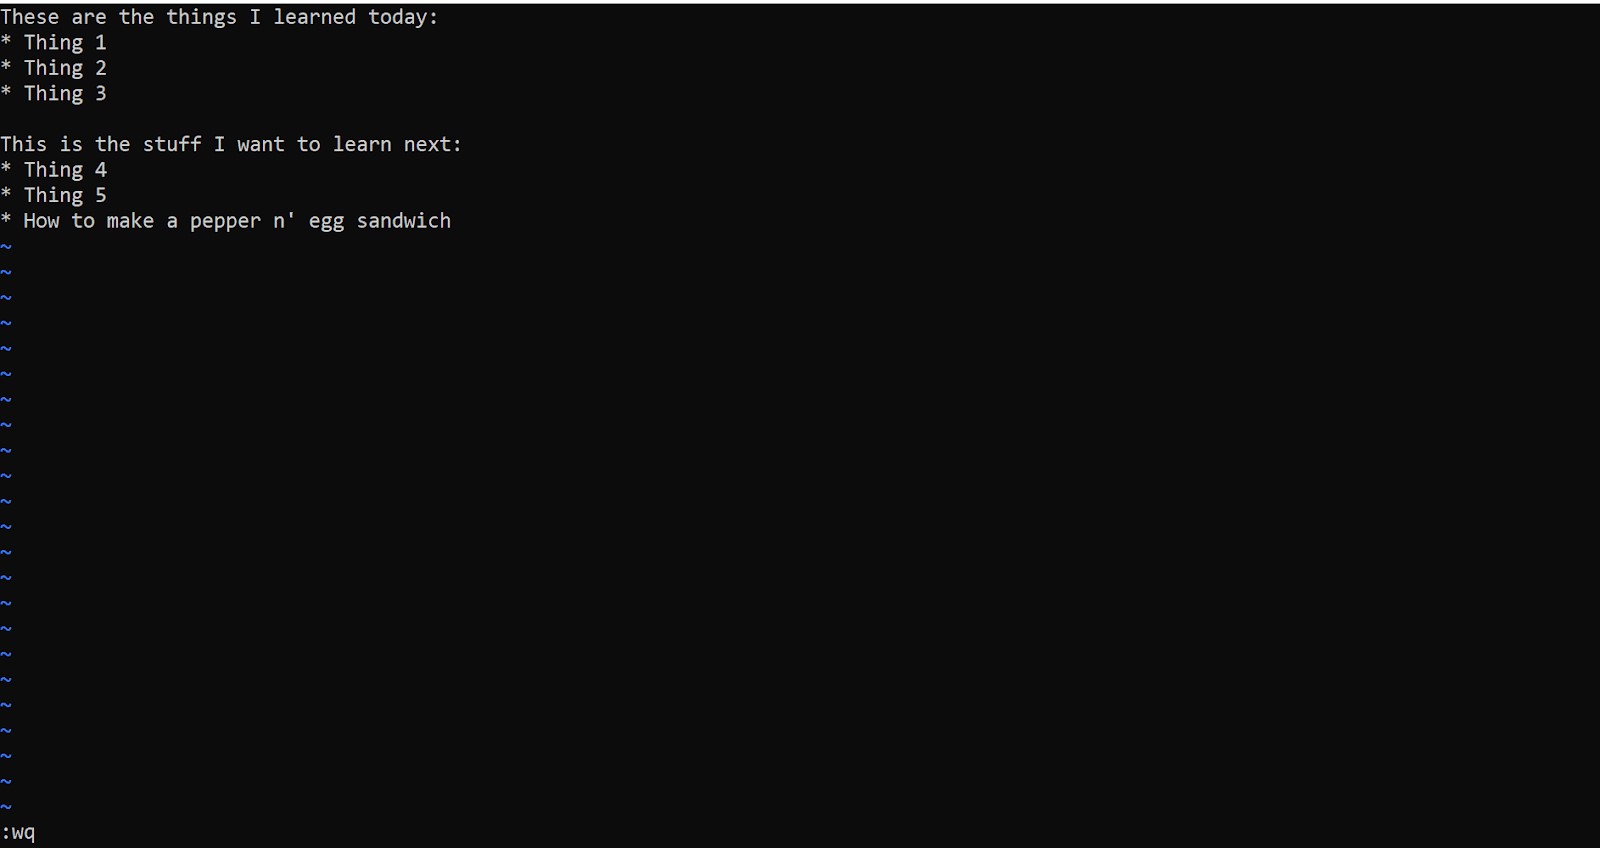
That’s all there is to it; our edits have been saved to “learningnotes.txt.” To verify, we may use cat learningnotes.txt to print the contents of “learningnotes.txt” to the screen.
|
:~$ cat learningnotes.txt These are the things I learned today: * Thing 1 * Thing 2 * Thing 3 This is the stuff I want to learn next: * Thing 4 * Thing 5 * How to make a pepper n’ egg sandwich :~$ |
Command 19: dd
The data duplicator command, dd, is used to transform and copy files. dd may be used to create ISO files, bootable USB sticks, copy master boot records (MBRs), backup drives, and convert the case of a text file.
Because dd is such a powerful tool, it is usually exclusively available to the superuser. The most simple application of dd is
|
dd if= of= [options] |
Let’s have a look at some instances.
We can use sudo dd if=learningnotes.txt of=LEARNINGNOTES.TXT conv=ucase to convert the “learningnotes.txt” file in our current working directory from our vi example to a version named “LEARNINGNOTES.TXT” with all capital letters.
|
:~$ sudo dd if=learningnotes.txt of=LEARNINGNOTES.TXT conv=ucase 0+1 records in 0+1 records out 168 bytes copied, 0.0042432 s, 39.6 kB/s :~$ cat LEARNINGNOTES.TXT THESE ARE THE THINGS I LEARNED TODAY: * THING 1 * THING 2 * THING 3 THIS IS THE STUFF I WANT TO LEARN NEXT: * THING 4 * THING 5 * HOW TO MAKE A PEPPER N’ EGG SANDWICH :~$ |
We may use sudo dd if=LEARNINGNOTES.TXT of=lowercasenotes.txt conv=lcase to convert “LEARNINGNOTES.TXT” to an all lowercase version named “lowercasenotes.txt.”
|
:~$ sudo dd if=LEARNINGNOTES.TXT of=lowercasenotes.txt conv=lcase 0+1 records in 0+1 records out 168 bytes copied, 0.0032191 s, 52.2 kB/s :~$ cat lowercasenotes.txt these are the things i learned today: * thing 1 * thing 2 * thing 3 this is the stuff i want to learn next: * thing 4 * thing 5 * how to make a pepper n’ egg sandwich :~$ |
While these are simple examples, dd is extremely strong and may be used for more realistic system administration chores such as generating backups or altering a file’s encoding.
Command 20: kill
The kill command is used to terminate a running process. If you’re used to ending a process on Windows using taskkill or Task Manager, kill should come naturally.
kill‘s most basic syntax is as follows:
|
:~$ kill |
ps can be used to get the PID of a process using the commands we’ve already covered. We used ps -a to find a running ping that we wish to destroy.
|
:~$ ps -a PID TTY TIME CMD 4 tty1 00:00:01 bash 11801 tty2 00:00:00 bash 11835 tty1 00:00:00 ping 11836 tty2 00:00:00 ps :~$ |
Because the corresponding PID is 11835, we just issue the command kill 11835, and the ping no longer runs.
|
:~$ kill 11835 :~$ ps -a PID TTY TIME CMD 4 tty1 00:00:01 bash 11801 tty2 00:00:00 bash 11837 tty2 00:00:00 ps :~$ |
Word of advice: If you already know the name of the process for which you need a PID, many Linux systems have the pidof command, which can make things easier. Simply type pidof. For example, we can use pidof top to find the PID of top.
|
:~$ pidof top 11838 :~$ |
The CompTIA A+ Linux commands may appear to be difficult to understand, but with repetition, they can be mastered. After you’ve mastered the fundamentals, there’s a lot more to learn about the Linux command line. As you begin to apply your information, you should gain a clearer sense of how everything fits together.
You’ll also probably come into situations when you need to utilize an option or command you’ve never used before. When that time comes, knowing how to read man pages and apply your core knowledge will come. Keep in mind that this is merely the beginning. Continue to study and use your talents.

PCCN vs CCRN: Which Certification Should I Take?
In this discussion, we will examine the fundamental distinctions between PCCN vs CCRN certifications, allowing you to make an informed and right decision about which certification is best for your nursing career progression.
June 20, 2023
Is PCCN Worth It? A Comprehensive 2025 Study Guide
In this article, we will provide all the enrollment criteria, how to apply, whether is PCCN worth it for you to obtain, and how to get a high mark.
June 20, 2023

PCCN Requirements - How to Become a Progressive Care Certified Nurse?
To become a progressive care nurse, you must first obtain the PCCN certification. This post will help you understand PCCN certification, PCCN requirements, and efficient approaches to obtaining this certification.
June 20, 2023